How high? What color? How wide? What type of fabric? How many? What hardware finish?
Are you ever plagued by these questions? I am.
Who knew there were so many decisions and challenges to dressing a window!
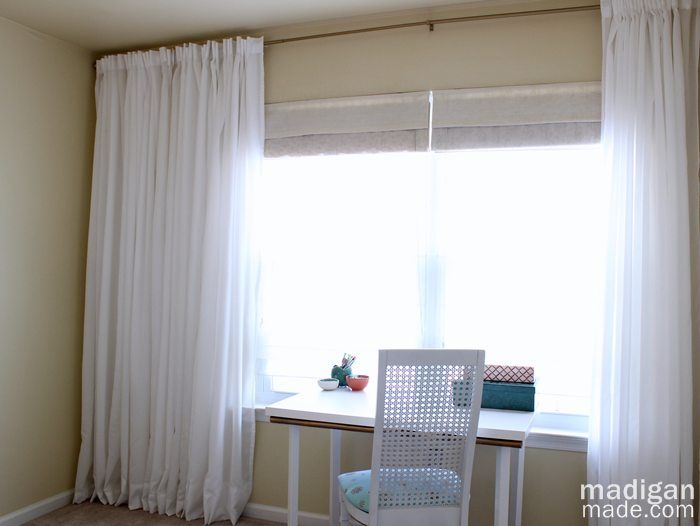
Remember the simple IKEA desk update that I shared on Monday for our office/guest room? Well, I’,ve been debating how best to treat the windows next to that desk. Up until now, I just had buttercream Roman blinds covering the openings. The windows needed something more.
The window is not in the center of the wall, so I wanted to hang the curtains across the whole wall. I hoped that this strategy would help to make the window look bigger and balance things out.
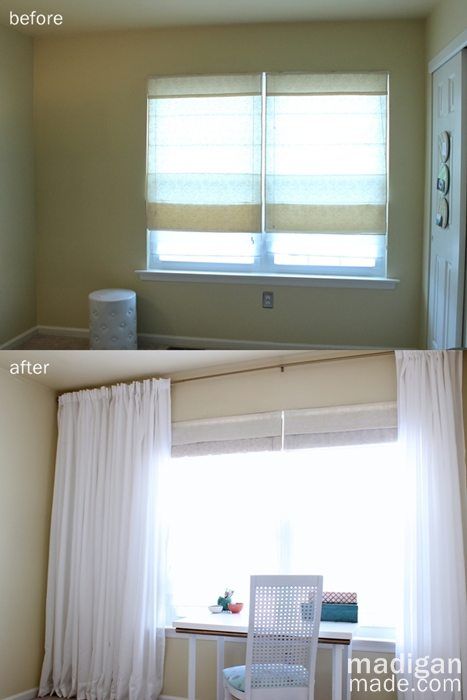
In order to do that, I needed a really, really long curtain rod. But the ones I saw were too big, too ugly and/or too expensive. How could I make my own long curtain rod?
I bet I'm not the first person to come up with this solution. But I was standing in front of the curtain rod selection at Walmart and an idea popped in my head to use two curtain rods to make one long one. (I was pretty excited and proud of myself. It’,s the little things that make me happy, ya know?)
Here is how I did it:
How to create one, long curtain rod from two smaller ones: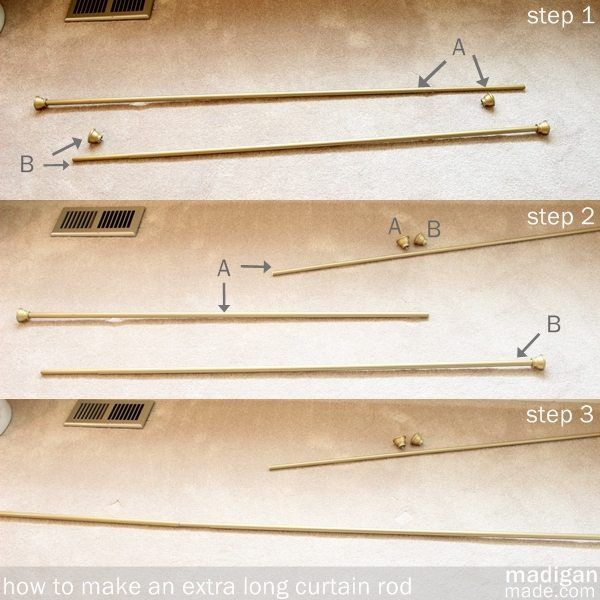
Step 1: Buy two matching curtain rod sets. I'm labeling them rod A and B for the purposes of this picture/diagram above. Each set has two finials. Each rod consisted of a large and small tube of metal. (not pictured: wall mounting brackets)
Step 2: Remove the smaller piece of rod A and one finial from rod A. Remove one finial from rod B. Set those pieces aside.
Step 3: Attach rod A to the end of the smaller tube on rod B to create one, long curtain rod. Attach a finial on either end.
Step 4: Hang the curtain rod with the hardware at the desired height, following the package instructions.DO use several mounting brackets along the length of the wall to ensure that the long rod and the weight of the fabric will be supported.
Then, just hem and hang IKEA curtains: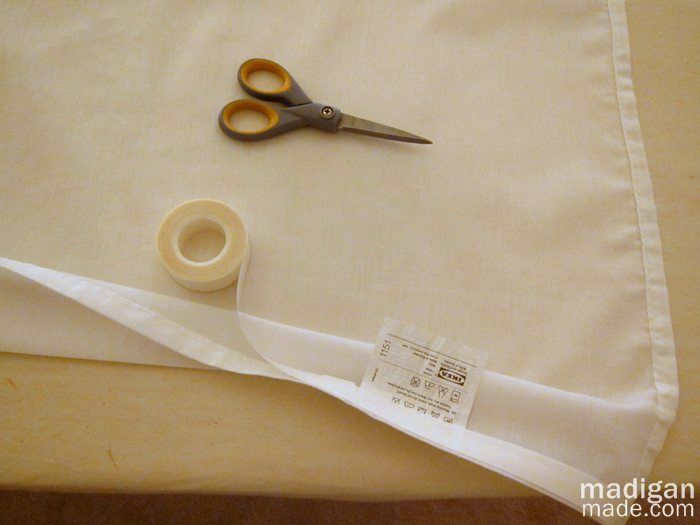
Wash your IKEA curtains. Hang each panel and mark the fabric with 3-4 straight pins where you want the hem to be placed. Iron the curtains and a crease where the hem should be. Use peel and stick or iron-on tape to hem the bottoms to the desired length. I liked my curtains to just gently puddle at the bottom. (Having the curtains puddle is also a little more forgiving if your hems are not perfectly straight…,. shh, don’,t tell anyone!)
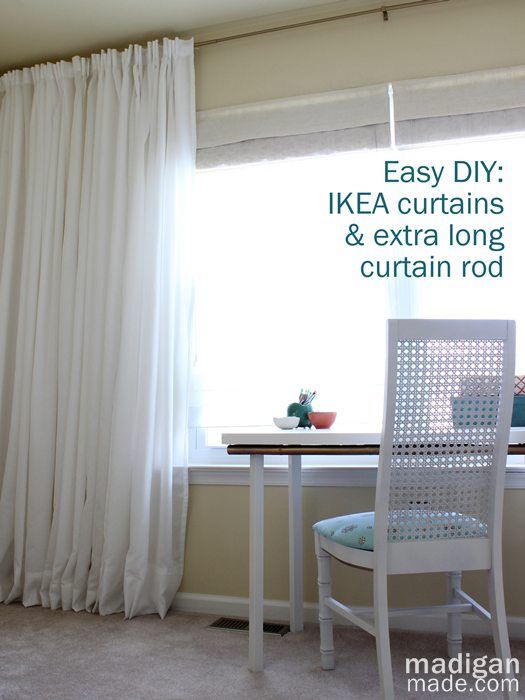
I have never hung curtains this high before and I like it! I’,ve always heard that this could happen, but this strategy really makes the room feel bigger. (You can read more on the importance of hanging your curtains high in Jenna’,s great post. Her advice is what convinced me.)
I was considering using blue curtains, but I decided to go with plain, white curtains (thanks for the suggestion, Mom). The white helps to lighten and brighten the space. And the brass color of the hardware picks up some of the other gold/brass elements I am planning to use in the space.
I used 6 panels (3 packages) of IKEA VIVIAN white curtains ($10 per pair) and two gold colored curtain rods from Walmart (about $10-12 each). All I needed were some tools, an iron and peel and stick tape (under $5) to hang them.
Who knew that $55 could create such drama in a space? I love it!
P.S. If you arereading this post from an RSS reader …, later this week I will be starting to truncate my RSS feed. I really do not want to do this. I know it makes things harder for you to read my content if you get my blog posts in your email or Google Reader…, but there are some really vile sites out there that are targeting home/craft blogs and stealing their content word-for-word onto their site. It is illegal for them to do this, bad for everyone’,s ability to be found by search engines and bad for blog business. It is so disheartening. I pour my heart and soul into creating content for this blog and I need to take steps to protect my hard work. So, I hope you will still subscribe to my blog and click through to visit when something interests you. Thanks so much for understanding.


0 comments:
Post a Comment